Guide to Plastering a Wall And Preparing it For Painting
If you have walls with multiple defects you can opt for materials that will partially disguise it – for example, textured paints or thick wallpaper. If you want to use normal paint, it is worth investing some time and effort in preparing the walls for its application. Many people are scared of this type of job and will only trust a professional handyman to do it. However, if you prefer a do-it-yourself route, we have created a guide that will help you get started.
Preparation of the surface
First of all, it is necessary to prepare the surface for applying plaster and remove all the substances that will weaken its adhesion – grease, dust, and dirt. To remove dust, use a vacuum cleaner or a regular brush.
When working with smooth concrete, cover the surface with bonding primer first to create a rough texture. This will allow the thick layer of plaster to hold onto a smooth surface.
Installing beacons for alignment
Before plastering, you need to set the final level of surface – here you can use a normal or laser level. Use metal, plastic or rubbed beacons for this purpose: keep in mind that metal and plastic beacons will need to be removed from the wall after the plaster mix has dried.
The main advantage of the rubbed beacons is that they do not need to be removed after the plaster layer has dried – this makes the work a lot more straightforward.
Basic alignment
To hide significant surface irregularities, use renovation plaster: it is able to level up to 50 mm in one layer (locally up to 100 mm).
To prepare the mixture, pour the required amount of water into the bucket and add the plaster powder from the bag. Mix the dry mixture with water using a drill with special nozzles for about 5 minutes. The substance is suitable for use within 40 minutes.
Plaster easily pounced on the wall and firmly adheres to various types of mineral surfaces. After application, smooth it with the hawk board, the trowel and the float. If you are processing a large area, it is easier to apply the plaster using a mixing pump.
Finishing touches
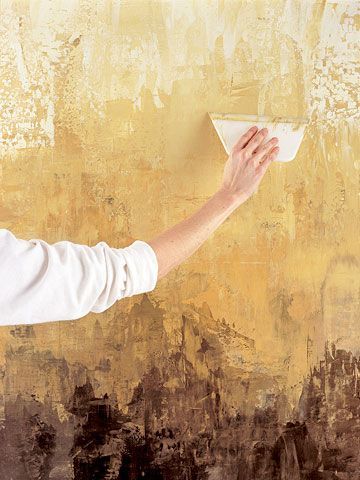
After the plaster layer has completely dried, you will only have to remove the minor irregularities of the wall using the finish plaster. When preparing the mixture, follow the instructions on the back of the package. The result should be a homogeneous mixture that can be used within 24 hours; and when stored in a closed bucket – within 48 hours.
Apply the finish plaster to the wall manually with a metal spatula or in a mechanized way with a thin layer from 1 to 5 mm. Apply each subsequent layer to the fully dried previous one: drying time should be about 24 hours.
After the last layer dries, remove the remaining minor irregularities with sandpaper. After that, you can safely proceed to painting the wall or applying wallpaper.
Be sure to prime the walls before painting: this will reduce the absorbency of the wall, strengthen the surface and provide the necessary paint adhesion.