DIY Mini Project : Corner Wall Christmas Tree
Christmas has arrived to most places around the globe, and you may have some free time for a Do-It-Yourself Project. If you have a couple of hours and a Christmas spirit, let’s turn on Christmas music and build a Corner Wall Christmas Tree.
There are several good reasons for this project. It’s reusable : You can fold it and keep it until next year holiday season ; and it saves a lot of space. If you have limited free room for a Christmas tree, you will certainly have a free wall corner to hang your next DIY creation.
What do I need?
- 4 Wood Strips. Approximately size : 50 inches (1.27 m) x 10 inches (25.4 cm).
- 1 Wood strip, sized 8 inches (20.32 cm) by 1 inch (2.54 centimeters).
- Around 70 small wood screws
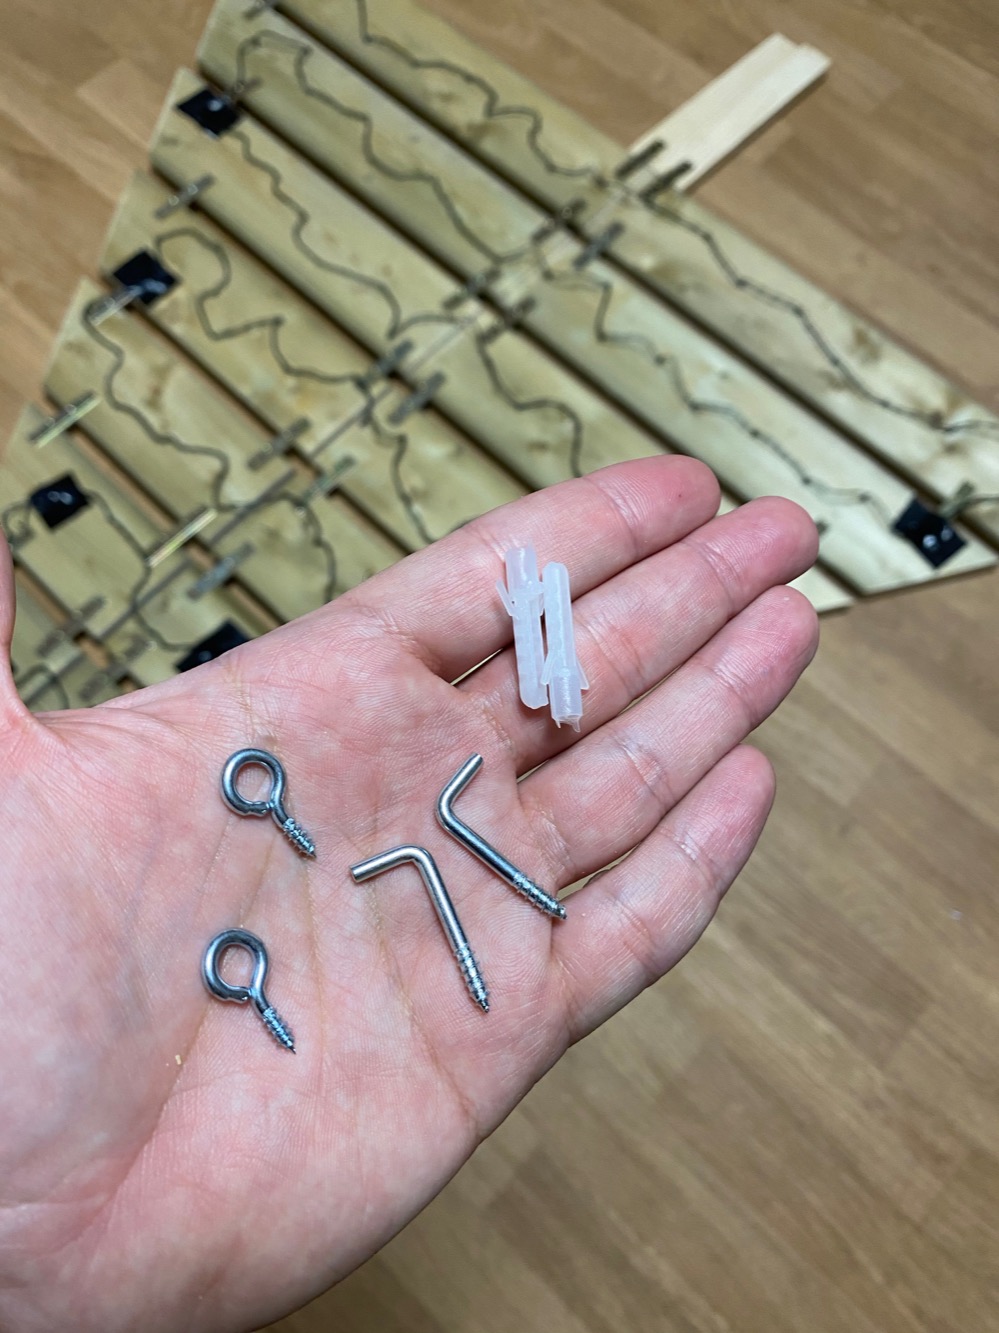
- 4x “L” Hangers.
- 4x “O” Hangers.
- LED Christmas lights stripe. The ones with 100 lights are the most suitable.
- 30x Mending metal plates of 4 inches (10.16 cm) approximately.
- A Christmas star for the top of our tree.
- A small saw and a driller.
- Sanding paper.
A bit of woodworking
Fist of all, we will explain you the concept with a drawing.
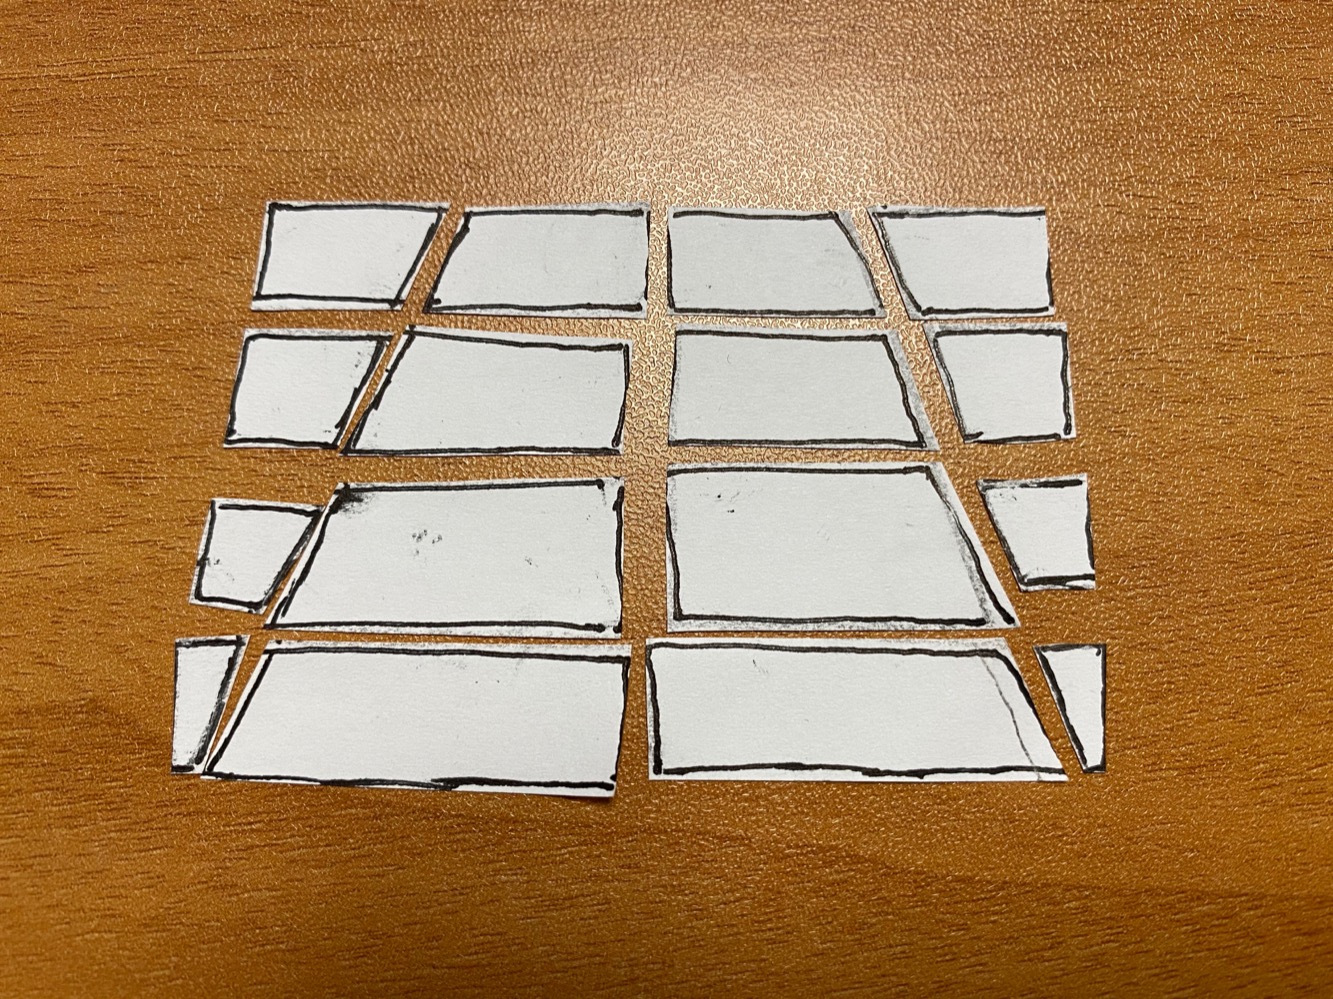
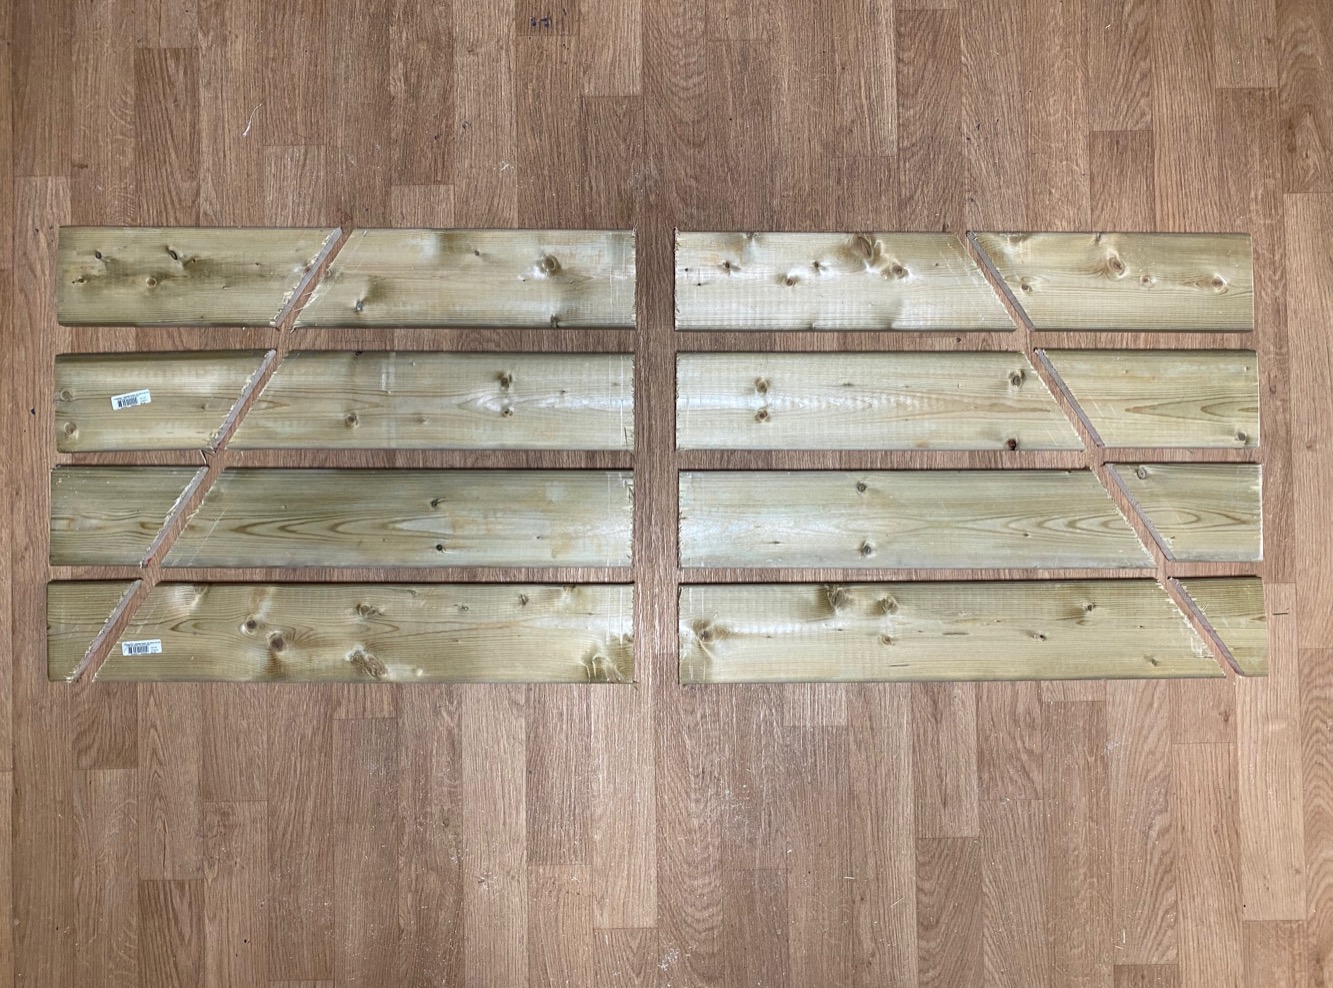
Mark the wood according to this indications :
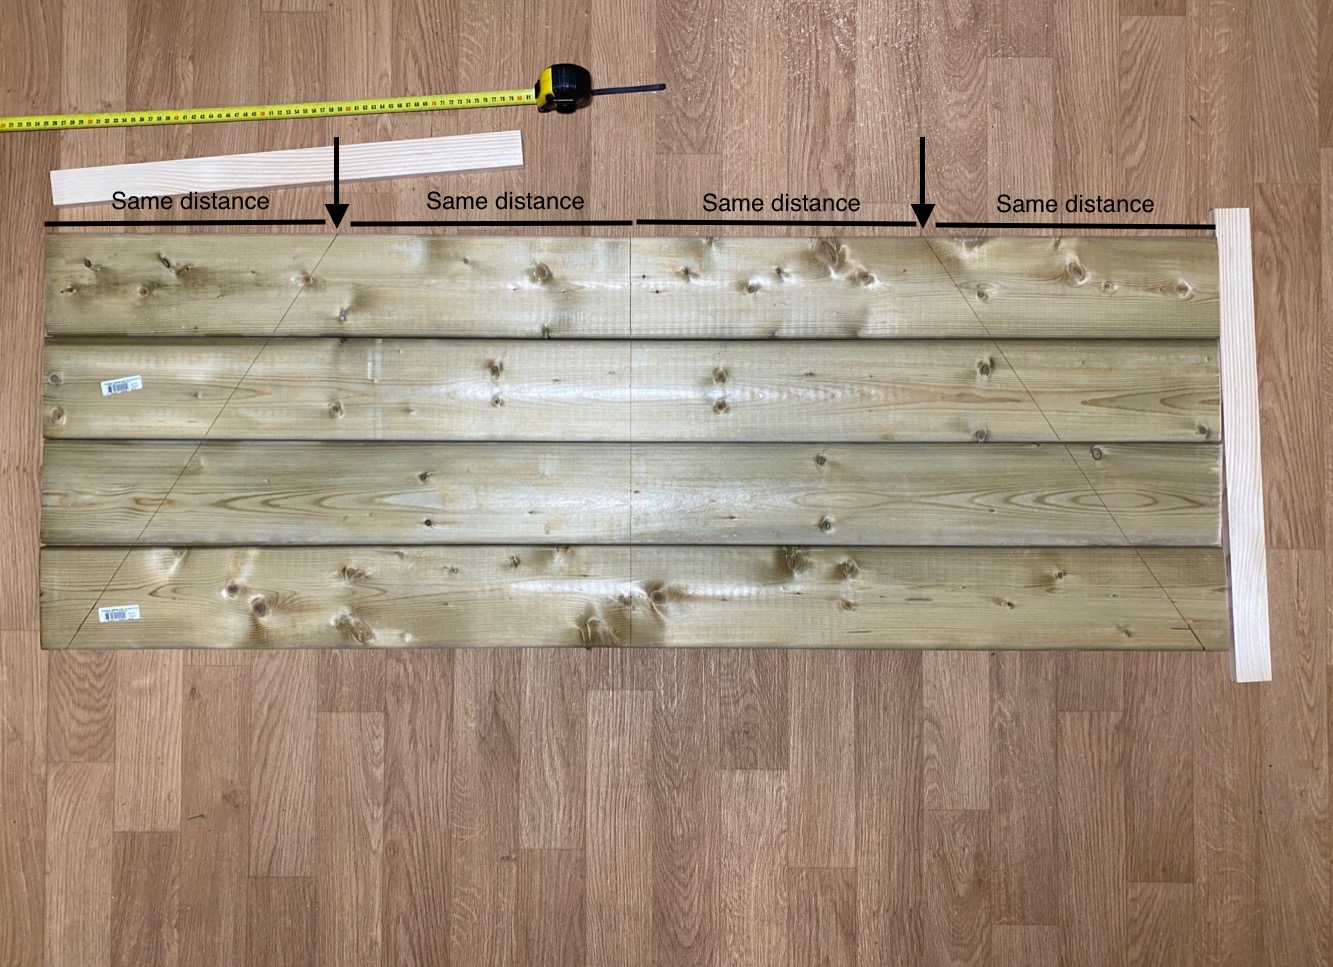
Using a saw, cut it following the lines :
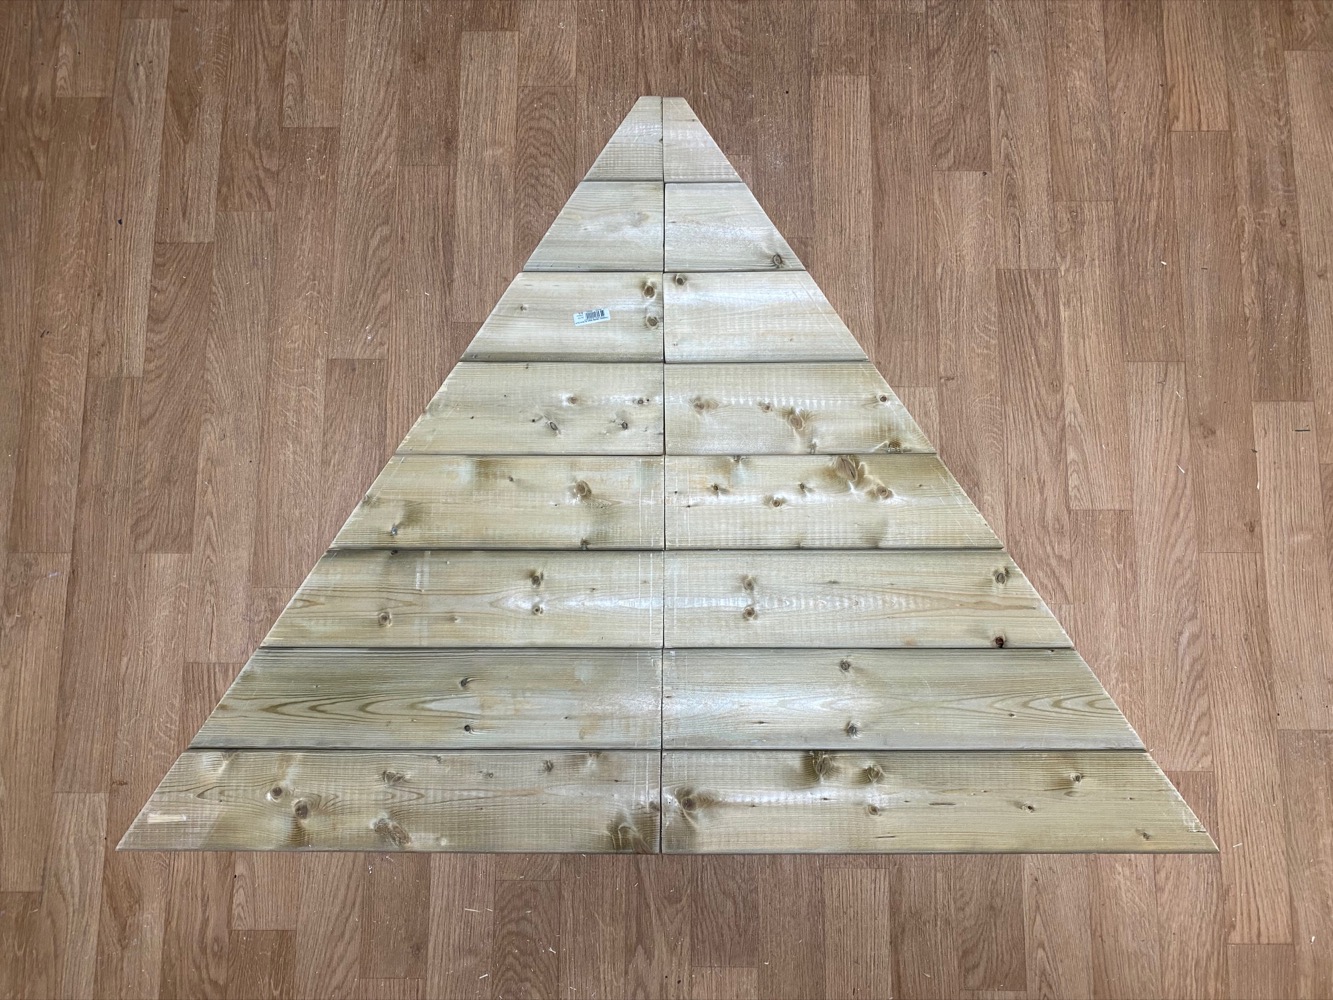
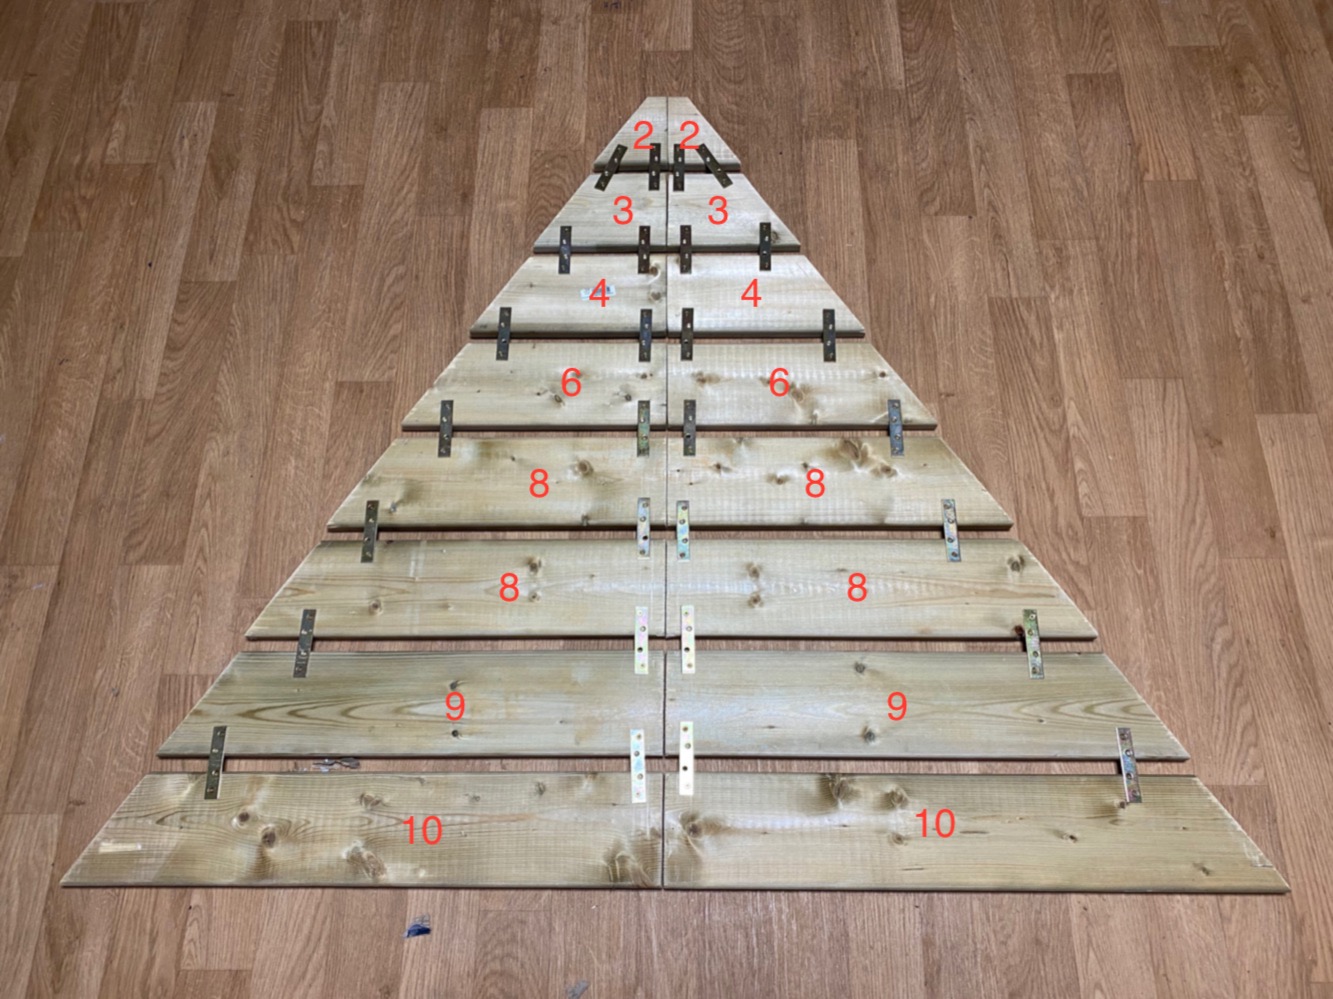
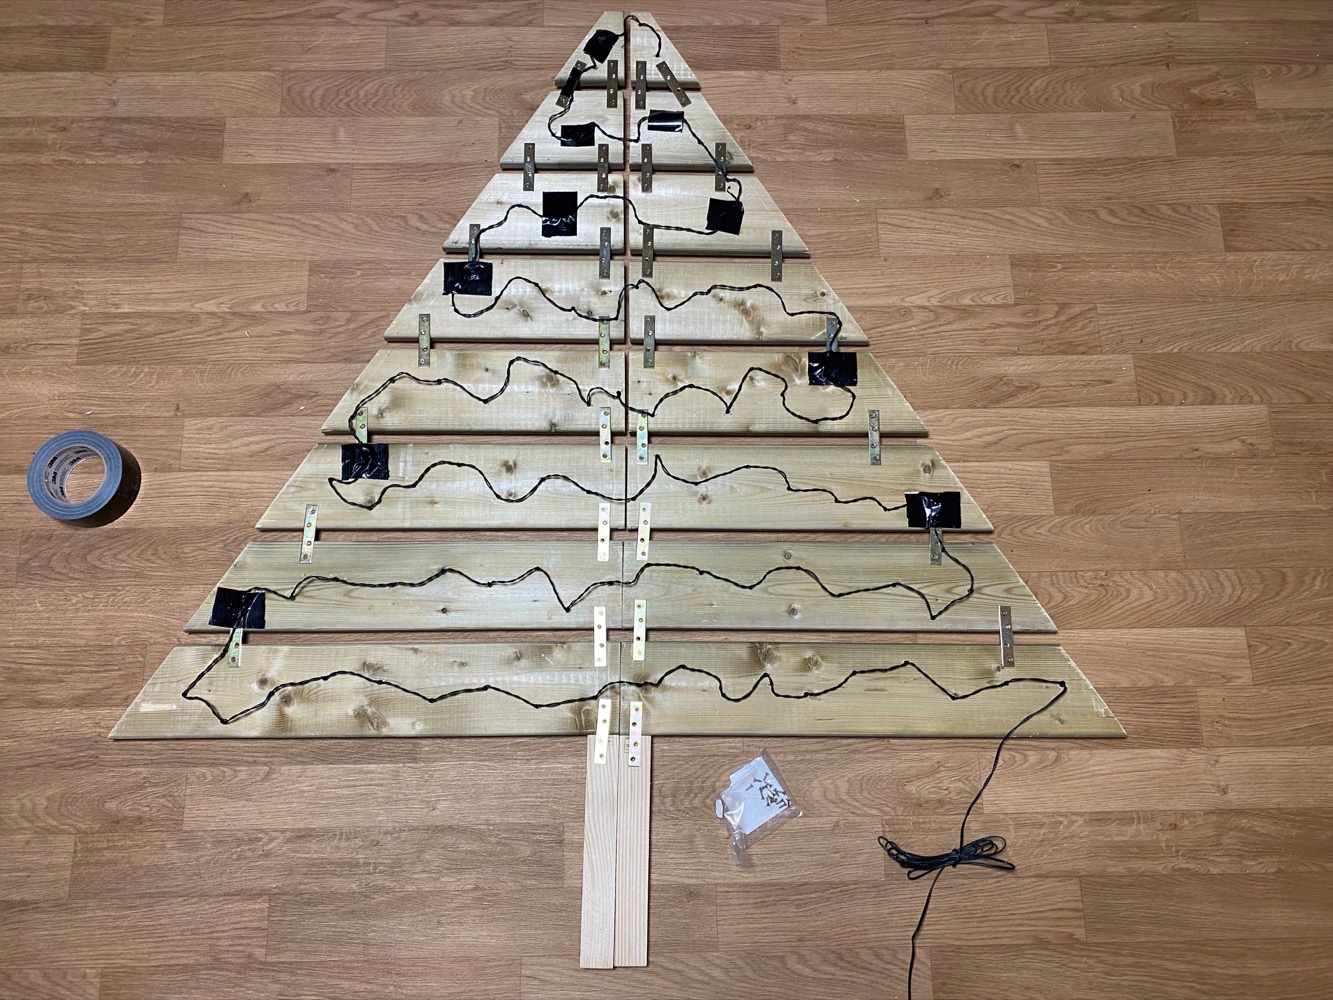
Once you are done sanding the borders, your tree should look like a perfectly even pyramid :
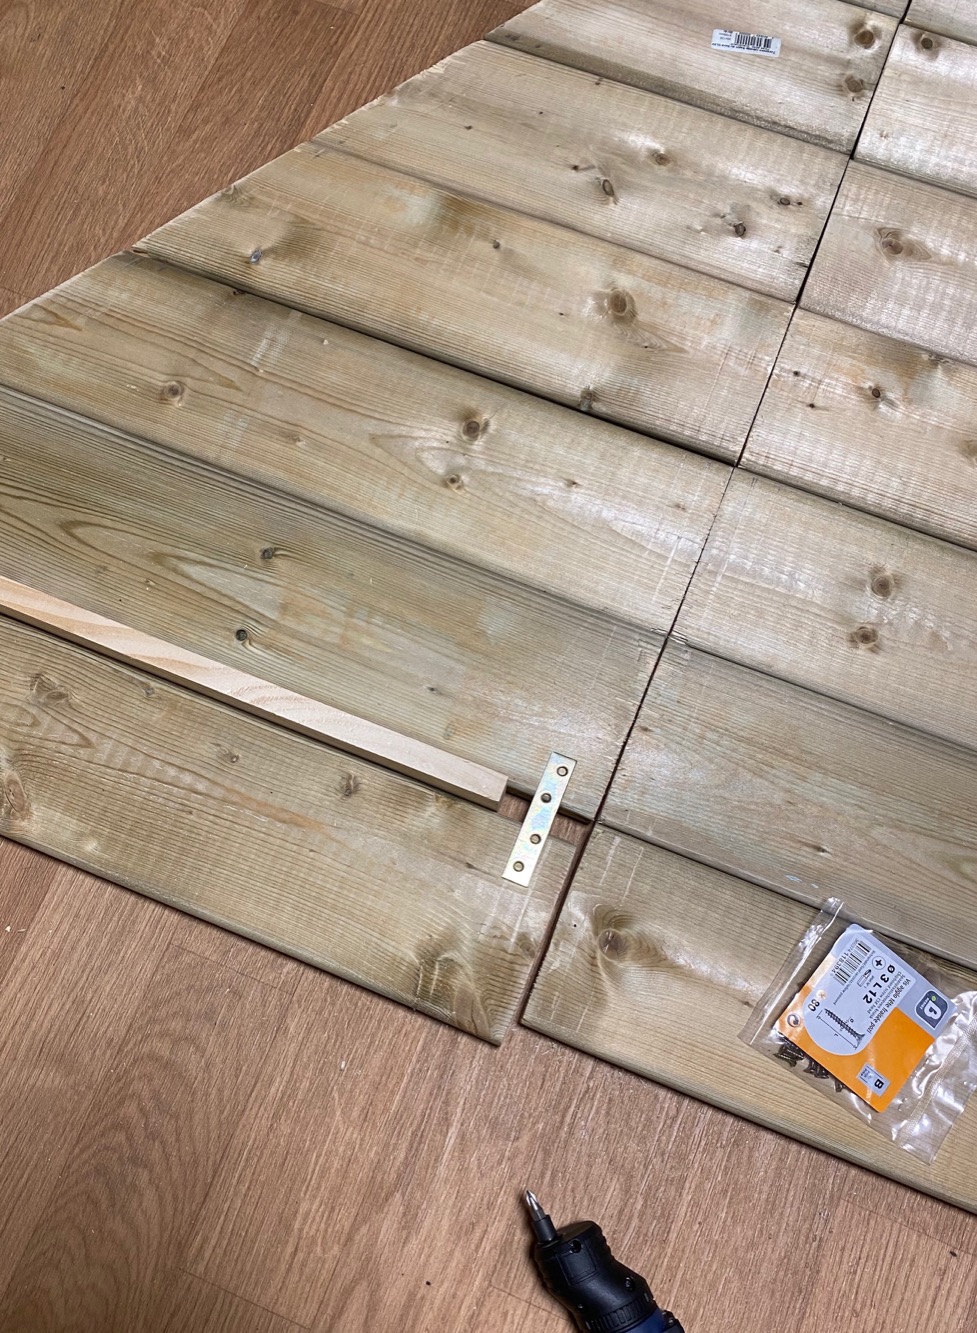
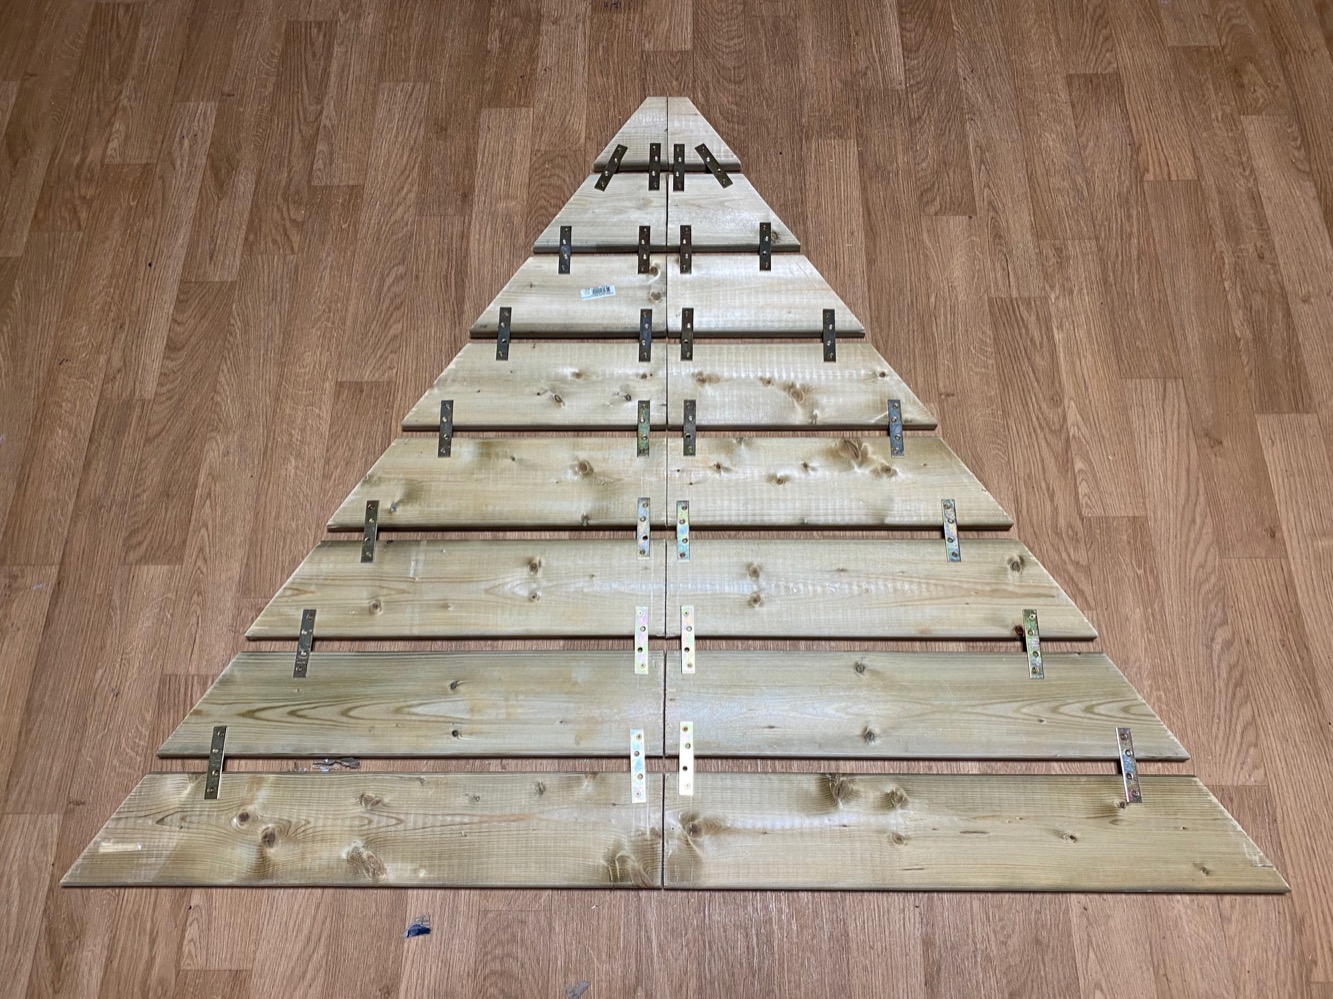
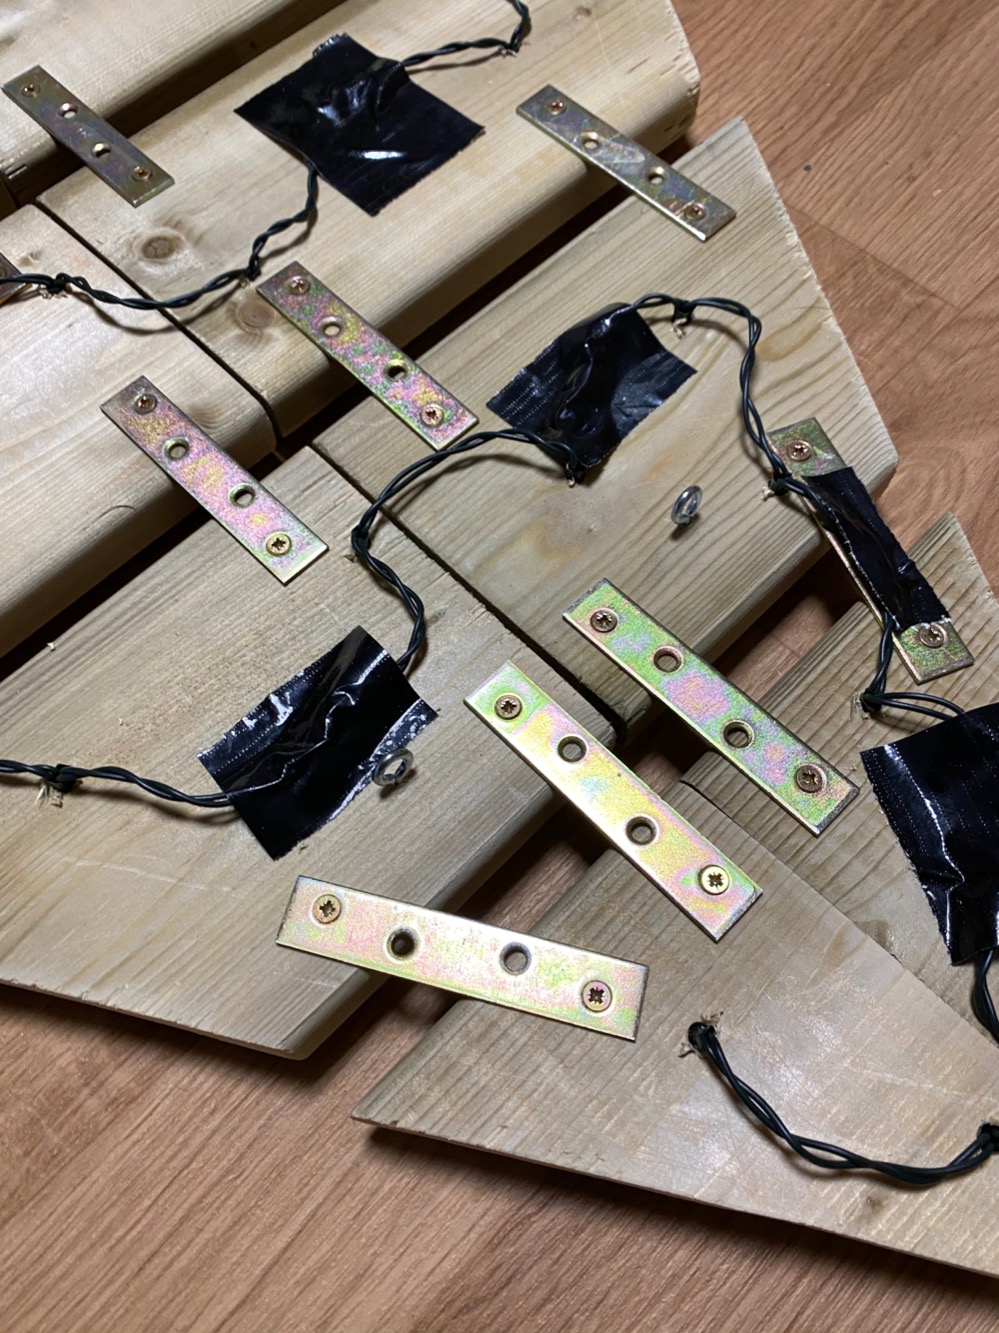
Using the small wood strip to separate the big ones, start attaching them with the mending metal plates and some screws.
Lighting up !
Now you can start making holes with a driller to pass the Christmas lights. If you chose a 100 pieces stripe, we already did the math for you. This is the right amount of lights on each piece of wood to use them all:
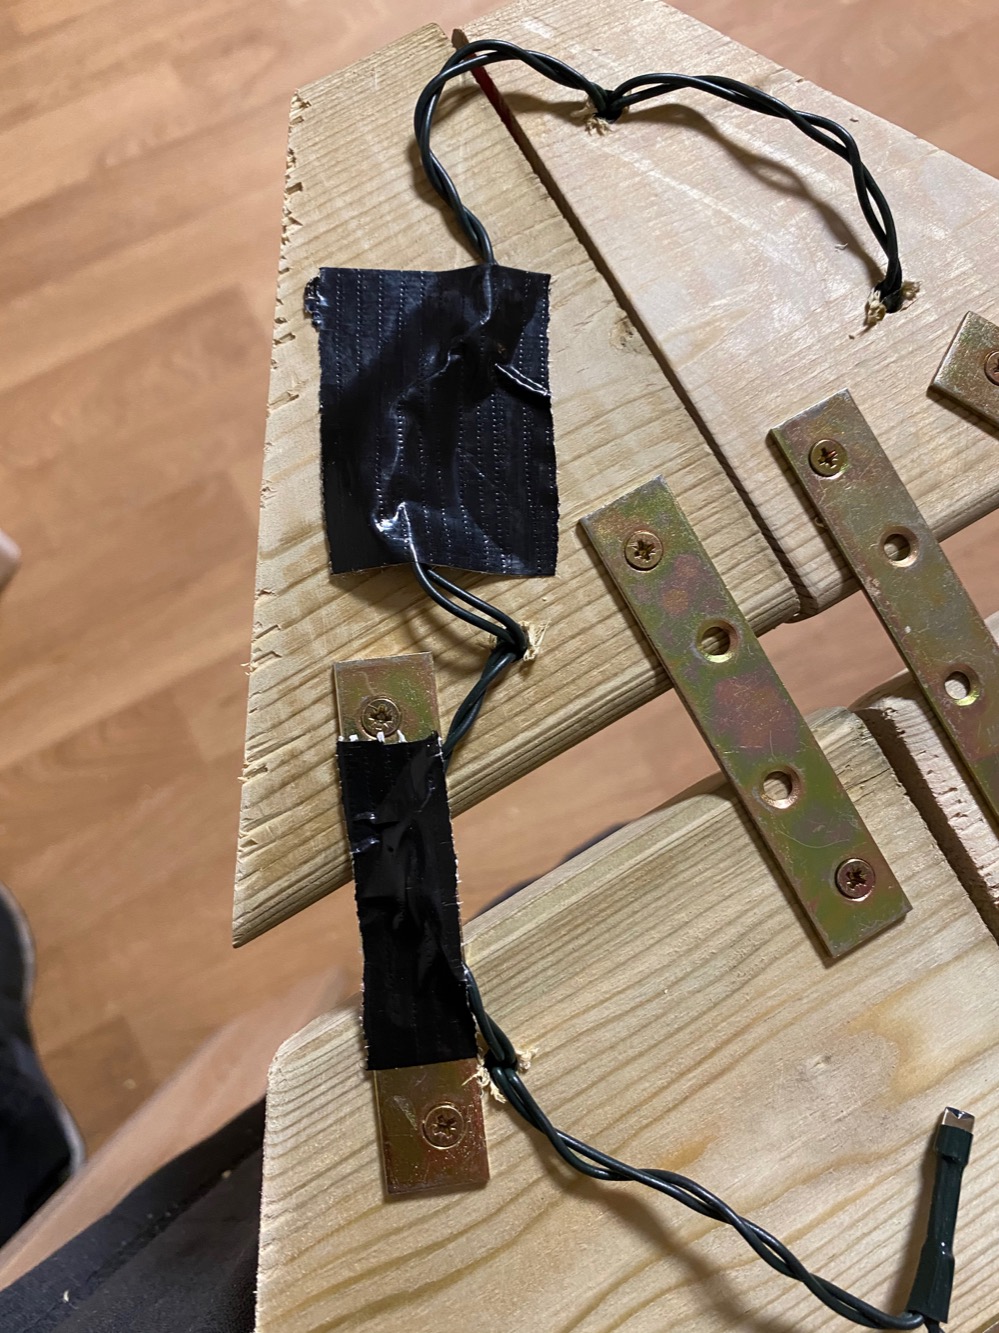
You can use some tape to hold the cable while passing from one wood stripe to the next.
Feel free to do the holes in random places, just keep in mind the distance between them, so you can pass by all the holes. The easiest way to do it, would be to do the holes one by one, while you attach the lights on them.
When you are done drilling, it’s the best moment to place some hangers. Attached the L shaped ones to the wall, and the round ones to the tree.
Once you are done, you can attach the feet on it.
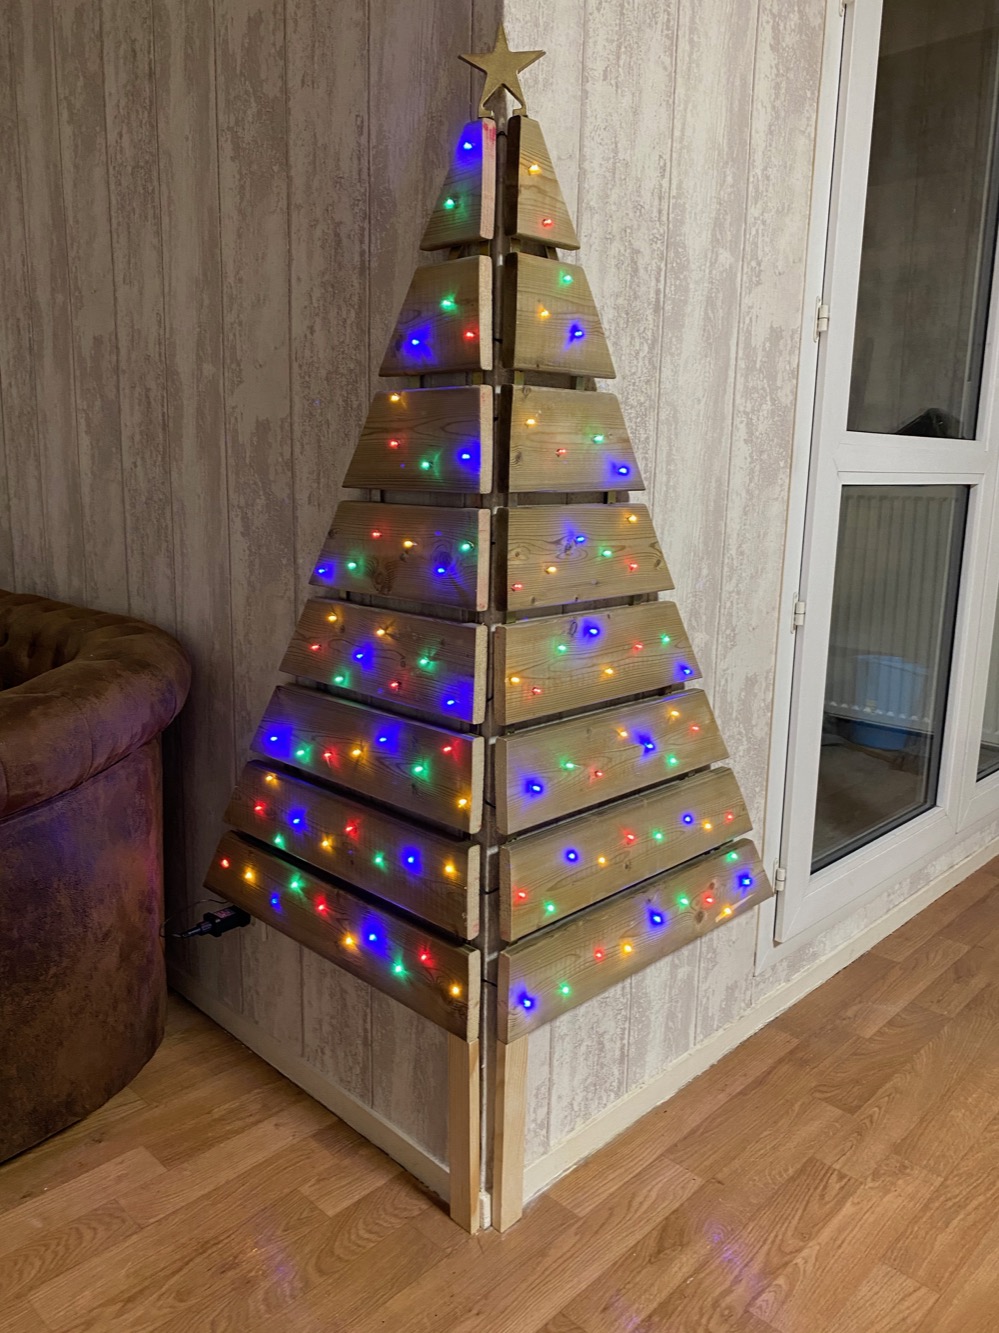
And here you go ! Your Corner Wall Christmas Tree it’s ready to be hang on the right spot and bring some color to your living room!
Corner Wall Christmas Tree : Final words
Your Christmas tree will give that Christmassy look to any room while keeping all the furniture in place.
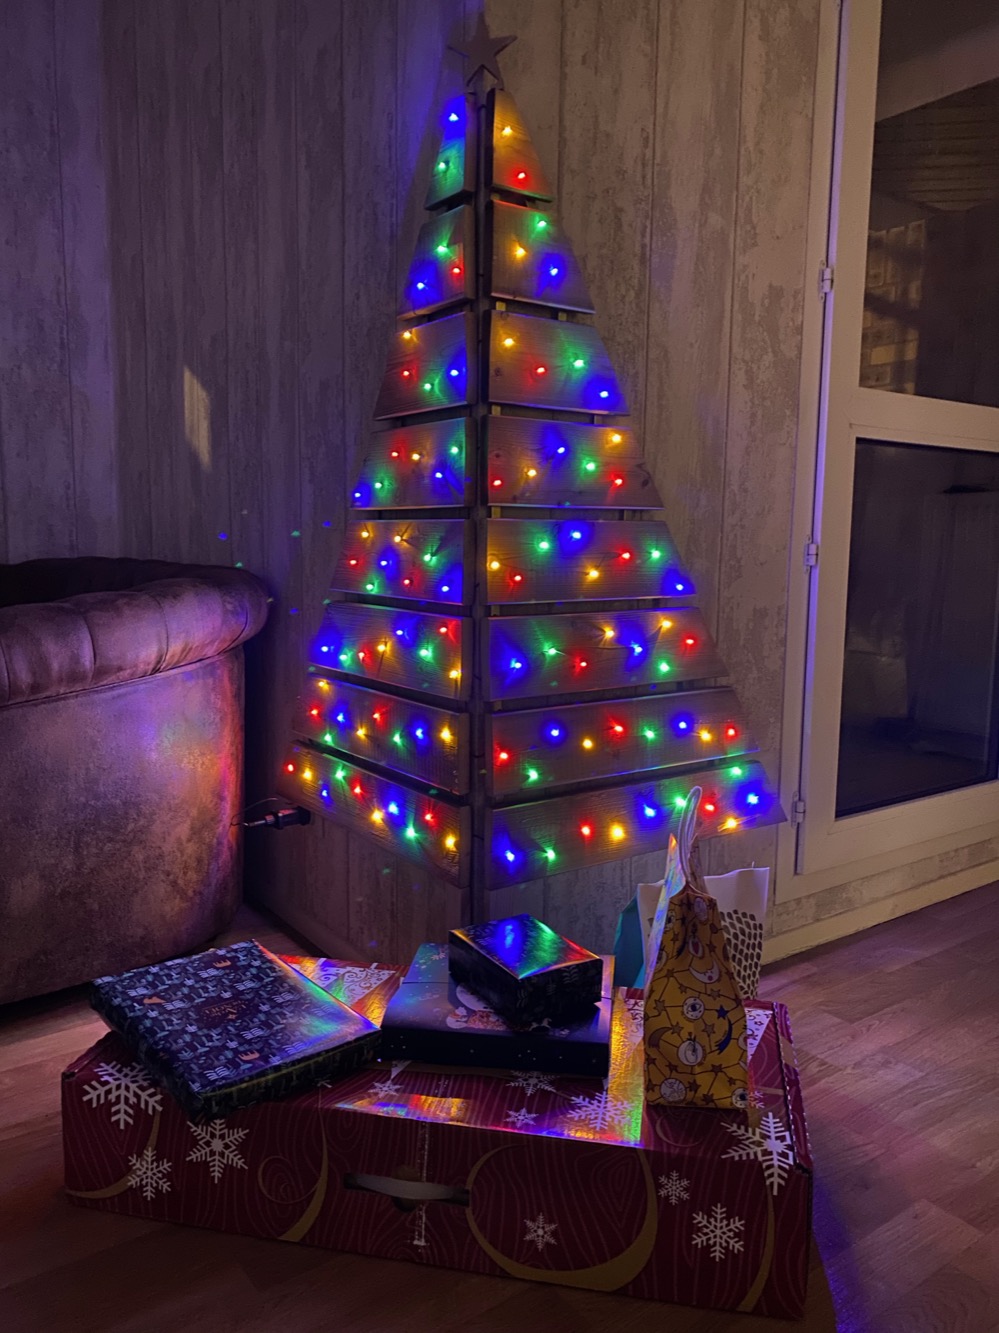
Feel free to decorate around, adding stickers or painting on it! In our case, we added some Christmas gifts so the corner looks cozy.
Did you like our mini Christmas project? Feeling like doing some other DIY during the holidays? Check the last addition to our living room.